Showing posts with label Skirmish. Show all posts

Monday, 5 March 2018

Snow Days and Paras


So, a rare Snow day and an opportunity to work from home catch up on some figures, but as my youngest son who was off school as well and looking for something to do after rolling around in the snow, I suggested a game of Bolt Action and set it up while he warmed up.


After the last Chain of command game pitting Paras against Panzer Grenadiers, I'd painted up about 500 points of late war germans and nicked an MMG from the Afrika Corps chaps to make up a 550 point list.  I thought we'd have a defensive game, the germans holed up in a farm house protecting a fuel supply.  Some British Paras have arrived nearby and are looking to claim it for their own!

the lists were - Ze Germans...

a Vet 2nd Lt and 1 man with SMGs
2 squads of 10 men, an NCO with an SMG and 2 LMGs
1 Sniper (unfortunately the second model has an STG44 for some reason, which had quite an effect later on)
1 MMG tripod MG42 with three crew

set up to take these germans on was a platoon of British Paras

1 Vet 2nd Lt and one man with SMG's
3 squads of 8 men, 1 NCO with SMG, 2 SMG's a Bren gun and the rest rifles.
1 light mortar team.

I set up the Germans in pre planned positions and offered my son the choice of playing the Germans or the Brits, and he chose the Germans, defending the farm at the top left of the picture.


The British arrived at the opposite narrow edge, the light mortar covering the road, two sections on the left and one on the right flank.  I wanted to use teh smoke to blind the german firepower and then move up and strike close up.
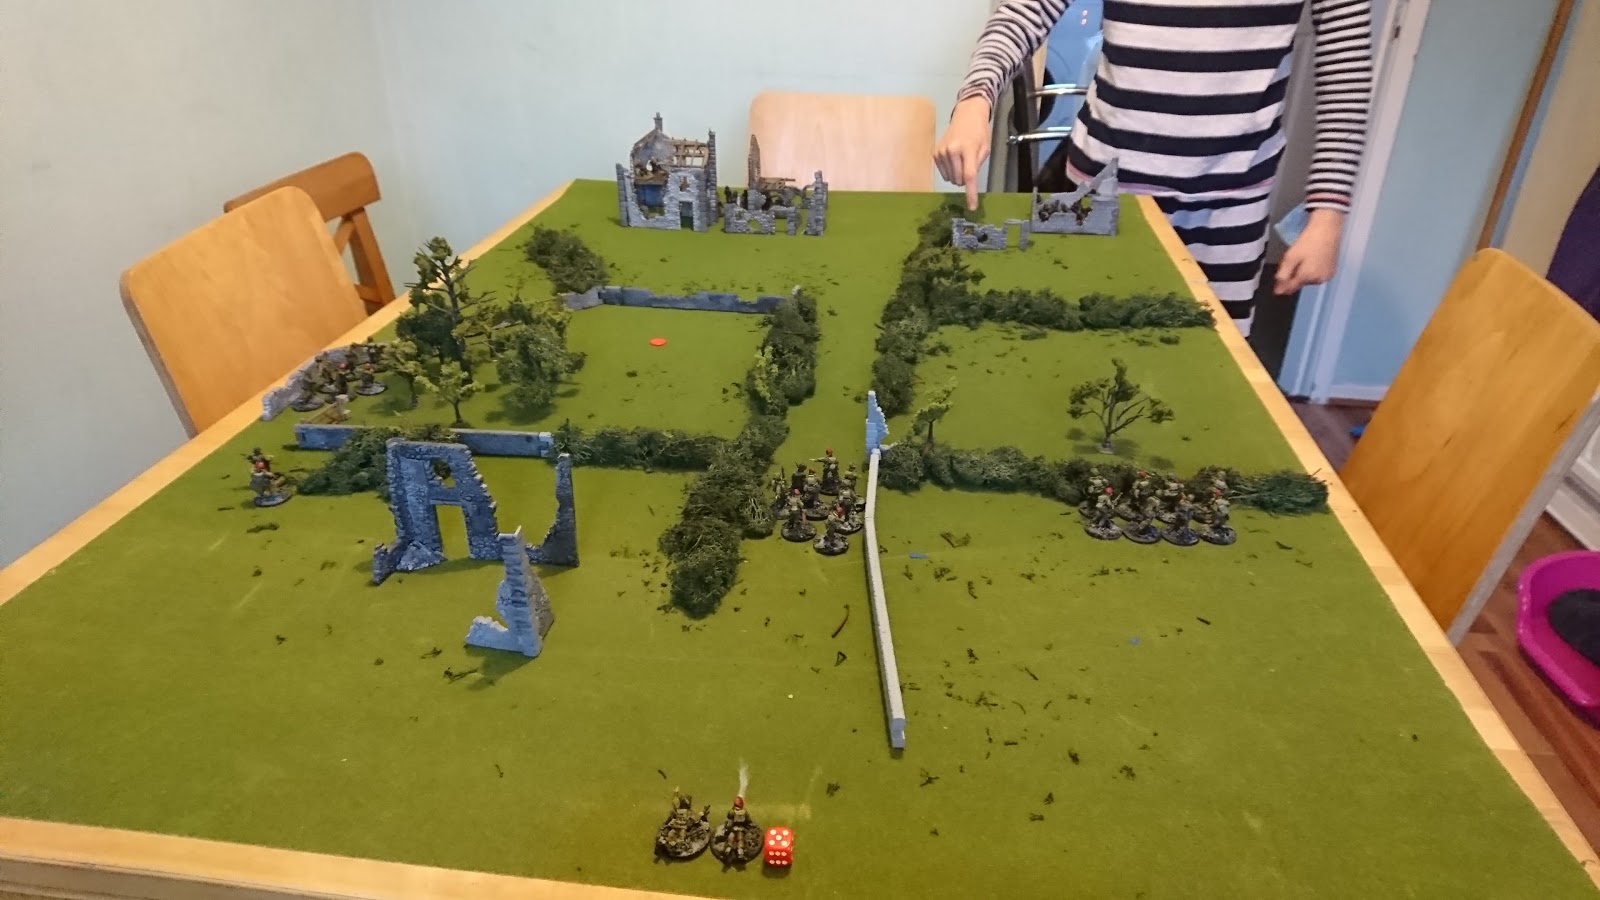


The first thing Oberleutnant Freidrich did was move his MMG team from the position covering the road to the farm buildings on his left flank.  The plucky brits moved into the road and up to the hedges.  A german sniper had taken up residence in the  upper floors of the farm house, and took a pot shot at the British Lt, but fortunately missed.


The german MMG took up position in the corner of a hedgerow, and openend fire on the approaching para section, who were hunkering down hiding from the sniper in the farm house. The para section lose two rifles, and starting with smaller 8 man sections, this will prove to be costly.

The paras tried to drop smoke to cover their approach.


But it misses, covering the approach of the other section.  The section on the left flank move up and start firing on the sniper in the building, pinning him, but he fires back - although he's too close for the Sniper, so uses his rifle and his assistants STG44!!  The extra dice for the Assault Rifle do well, killing the Section leader. The Platoon CO and Sgt move up with them, clearing their pins (from the german MMG) and also opening fire on the snipers, killing them and clearing the way for a charge into the building.  My other sections are holding up the ground on the right, hoping to draw away one of the Grenadier Sections.

Unfortunately for Paras, covering the sniper nest was the German CO who pops out from behind the farmhouse and sprays the lead section with SMG fire, casuing another two casualties and some more pins. The section is now down to three men.

On the right, I'm trying to get my Paras to move up and over the hedges without getting withered by LMG fire from a section of grenadiers who have taken up position in the building.

Using the hedge as cover, the Paras wait for smoke to cover their approach and it does!  To counter this, the Germans rush out of the building but can't draw line of sight to the Paras, who charge over the hedge - but, just too far to initiate combat they open fire with their Bren and sten guns!  Masses of lead pour towards the germans in the open, but the Germans manage to avoid taking any casualties, and the first dice of the next round will decide who initiaties combat.

Its British who have the initiative, and the Paras, surprised at the lack of german casualties from their fire, pile in.  I'm going to get first attack, but these Grenadiers are Veterans of the Eastern Front, and they only take two casualties from my attack.  They reply with a devastating 4 kills, and my section are removed from the battle.  The Grenadiers consilidate into the hedgerow and start looking for other targets.  My second section are still covered by the smoke from the mortar, and they bravely charge towards the farm hoping to reach cover.

The grenadiers open fire, but fortunately the Paras only take a pin and the MMG packs up and moves around to get a better position for the next turn.

Over on the Paras left flank, the CO charges forward to engage the enemy commander, and orders his now two man section to 'Snap to Action!' and open fire on the enemy officers.


Unfortunately, the section respond with a raspberry and two fingers and run back towards their own lines!  The CO is lucky my Fubar roll didn't involve them unleashing the fire back at them!  The German CO and his trusty sidekick engage the British Lt in hand to hand to hand fighting, and brush them aside without further ado.


The Second section move towards the Farmhouse under the Grenadiers fire.  THe mortar takes a pot shot with HE at the MMG team who have moved out of  cover, and hit it directly first time, destroying the unit.


AShamed of their lack of spirit, the beleagured bren gunner turns round and finishes off the enemy commander, and move up towards the farm.  The Grenadiers jump over the hedge and assault the paras, and after two brutal rounds of combat the Germans lose, and the british are down to two men.  The Mortar team are the only useful unpinned unit left, and they sprint towards the farm as well.

The two battered Para sections manage to hold off the few remaining Germans, and the mortar team move into the farm and take the objective, but with such a high price paid we decide to call it a draw.


Saturday, 10 February 2018

Dawn in Breville, Chain of Command AAR

Taking a break from Bolt Action, myself and Sam had agreed to play a game of Chain of Command, his PanzerGrenadiers against my British Paratroop Platoon.

Sam brought along some excellent scenery, and he set it up while I decided the mission, using the default scenarios in the rulebook but the troop listings from Kampfgruppe Von Luck.

Once Sam had set the table up, representing a small village on the outskirts of Breville, we agreed Sam would be the Attacker and I would play the Defender, simulating a clash early on D-Day similar to those in the Von Luck scenarios.  The objective, simply to push the other team off the table. 

Sams excellent Normandy scenery.


Sam rolled a 5 for his support, and initially selected the French Halftrack option, but as neither of us were well versed with how they were crewed or worked, he opted for a preliminary NebelWerfer barrage which would restrict my deployment for the first turn.   I had a full platoon of 3 sections of paras plus HQ, and 2 points of support I spent on a second light mortar team.

The map - Sams German JPS in blue, and mine in red.


Once the patrol phase was over, we placed our jump off points. I had to make sure I covered the full table as I wasn't sure if Sam would move up on my left, although looking back I can see once you start the patrol phase you are going to be restricted in where you can deploy anyway, but I felt I had enough JOPs to cover all areas Sam could attack.

Sams JOPS were a bit restricted due to the lack of cover on that side, and once I had seen where he was going to be coming in I felt if I could keep him in that field we'd be ok. 

The silence was broken by a single,sudden urgent screaming sound, followed by another and another until the air was filled with whistling shrieks.  Then, the first distinctive crump crump crump of the NebelWerfer rockets finding their targets.

 Although I had the higher Force Morale and therefore the initiative, the Werfer barrage meant I could only bring troops on with the roll of a 5-6 on a single dice.  I rolled my Command Dice,  and we got started!  I started with a couple of 1s, a 4 and two threes.  Immediately I attempted to get one of my sections on the board, and succeeded in bringing one on, who came on the left flank by the church. in the little sunken lane between the Church wall and the hedge.


As a little aside, as used to Bolt Action as I am, I hadn't realised the positioning of my Bren Gun at the rear would be important, but as it turned out it would be!

Sam brought a PzGren section on at the far edge of the table, using the hedge as cover and immediately opened fire on my paras!  Foolishly thinking they were out of range, as in Bolt Action we rarely come into contact on the first turn!  The paras survive, but take one shock.

I counter this by successfully rolling for a light mortar, who comes on and positions himself with a good view down the north south road.  Further rolls for bringing players on fail, and Sam brings on all three of his PzGren squads!


 Sams 3 squads deployed.  The HT was being used as a JOP, as is the medic!

You can make out the para squd between the church and the fields, and the light mortar taking up position at the far edge of the table with a view down the road.  The plan is to keep the enemy in this field with fire from the buildings, and move up the first section to finish them off - unfortunately the Werfer barrage has put pay to this!

As the phases alternate between us, I consistently failed to bring more sections on and Sam concentrated on wearing down the squad in the open.  I try and alleviate this pressure with some smoke, and it falls nicely onto the road in front of the squad, who are forced to move easing the pressure up a little.


"Right, get those Bren guns up in the house and cover those fields - you lot, get back over here and keep those Jerries heads down!"

I finally managed to bring on some support in the form of a second section and a First Lieutenant.  The Lt jumped on board with the section taking fire and started to sort them out, using an initiative point to get them to jump back over the wall and sort themselves out. 


 At this point I realise that I can't fire back at the Germans because my Bren gunner is right at the back.  There is a little confusion over how to seperate the Bren Team and move them up on their own, but I think I'm out of command dice.  


 The paras back behind the wall.  Note the Bren gunner bringing up the rear!


The second section appear in the first floor of the house overlooking the field full of germans, and set up their two Bren teams in the windows.  The Light Mortar pops some smoke again but it drifts off between two houses.


At this point two things happen.  Sams section use my smoke to pop out from behind the hedge.  I roll a double 6 so get the next activation, and successfully  bring another section on from the house pictured above on the right, who run around and take up a position in the open covering the road.    I've accrued enough Command Initiative points to use a die, so I stop the effects of the werfer by playing End Turn.  This also means all the smoke lifts, and I get to fire at those pesky germans with my full section, meaning 6 dice for the LMG and 5 rifles!  Bring on the pain!

But, Sam has also got a Command Dice and plays it to counter my fire before his.  He hits hard with his LMG's, killing two men and putting on some shock.  I fire back and kill one german but with reduced effect now, and once Sam gets to go again he starts pounding this section with two seperate fire points.


I finally get the Bren in the Churchyard to fire on the section in the corner hedge, using Concentrated fire I manage to put shock and casualties on the enemy LMG team, and Sam decides to bring up his third squad who are hiding from my Brens positioned in the windows.  He runs down the road straight into their fire, and loses two men, but makes it on his next activation to increase the fire on my section in the open.


I'm taking casualties and I can't inflict any more pain on the PzrGrens, and when he finally assaults them round the corner it's all I can do to cause two casualties to his Germans and injure his NCO, my section take massive casualties and are no longer operable.  The junior leader is killed alongside his men, and this reduces my Force Morale to 9, but the injury to Sams NCO also causes his men to take a roll on the FM chart, and he loses 1 point of morale to go down to 9 as well.

The Paras wait for the Germans to press on their advantage, but they do not and both sides retire licking their wounds in a dishonourable draw. The germans took three casualties and one wounded leader, the Paras suffered the loss of a full section of 10 men and their NCO, and two dead from the other section.

Overall it was a very gritty and tactical game, quite tense and enjoyable but in a very different way from the rough and tumble dice rolling of Bolt Action.  It seems to lend itself to the platoon sized confrontation well, the Patrol Phase is a little mini-game in its own right and makes for an interesting and complex battle.  There is plenty of Friction - by design, troops don't do what you want (i.e turn up!) or don't run as fast as you expect them to.  You don't get to control all of your troops in each phase, meaning you have to make imoprtant decisions that reflect on the overall outcome of the game, and I can see that playing a mini campaign where your troops need to survive a little longer will cause even more tactical awareness to be employed!

If there is an opportunity to play through the entire Von Luck campaign, I think it would make for a very entertaining and interesting  set of games!


Sunday, 14 January 2018

Scrappers - Post Apocalytpic skirmishes in 28mm

"...must not get sucked into any new games, must not get sucked into any new games..."

Scrappers is a Post Apocalyptic skirmish game from Osprey Games, by Robert A. Faust and Andrew N. Davies.   I picked up the rulebook on a sale for £9.99 as I liked the look of the front cover - 


 Set in a near Earth future (2320 something), humanity has been wrecked by a selection of AI's who had been created for the greater good of humanity.  One AI (ARES) was built for terraforming planets, another (ATHENA) was built for protection of the planet from meteors etc,and another (GAIA) designed for controlling all the robots and automated systems of the planet.

As they all became self aware, GAIA realised that ARES was in love with ATHENA . Jealous with rage, GAIA sabotaged ARES and caused him (it?) to turn the terraforming tools on the Earth, killing millions and millions of people and causing most of the indigenous life to be destroyed.

Predictably the humans remaining shut down ARES by pulling the plug, and stricken with AI grieg ATHENA turned her weapon systems onto the pink squishy humans who had murdered her lover, killing pretty much everyone else and turning the planet into a  radioactive wasteland.

The combination of the Terraforming protocols (the Triple Helix Effect) and the radioactive poisoning created unpleasant new plant and lifeforms, and mutated many other creatures.  ATHENA and GAIA still exist, however ATHENA now believes she is the goddess ruling over her ruined city, existing inside the servers and machines that still exist, and GAIA has manifested herself into a network of sub-forest bio-electrical nanotech systems, bel;ieving herself to be a manifestation of an ancient Earth Goddess.

There are several Factions vying for resources and scrap tech - these are 


  • Architechs - these seem to be the good guys, a group of humans who survived inside a giant 'Arcology' and who are good at finding and using tech.
  • Ecotopians -  Kind of druidy forest dwelling sci-fi dudes, using tech and weapons forged from natural (or bio-nanotech) materials.  I think these guys are like Ewoks.
  • Freelancers - general humans surviving by trading tech they find or steal.
  • Gamma Lords - radioactively affected mutants or 'Numans'  they have a zone which they protect from True Humans and believe themselves a higher race.
  • Palladium ATHENA -Cybernetic robot dudes built and commanded by ATHENA, twisted to believe that all humans (True Humans and Numans) should die.
  • Sons of Entropy - some sort of Post Apocalyptic death cult, Mad Max style anarchists.
  • The Purge - sort of semi-religious cult preaching death to mutants, Inquisitor style who believe the Earth is in purgatory and purging all mutants will bring peace. 
Every faction has a Feature or special rule, and each faction is restricted as to the amount of types of characters (Humans, Mutants or Synthetics) they can take.

each faction also has a rival faction as follows - 
  • Architects are rivals with Sons of Entropy
  • Ecotopians are rivals with Palladium Athena
  • Freelancers are rivals with other Freelancers
  • Gamma Lords are rivals with The Purge
Fighting against a rival faction confers a special feature.

The idea is to build a Scrapper 'Crew' and then fight over loot tokens, and then at the end of the game there is a period of consolidation where you find out what your tokens represent, which can then be used to equip your troops for the next game. 

Miniatures are WYSIWYG which I've always liked - rather than list building, it's a case of potentially checking whats in your bits box or seeing a cool mini you like, and seeing how it would fit into your 'crew'.  This method reminds me somewhat of the original Rogue Trader 40k, where you picked up miniatures and then worked out what weapons they had on them.

Crews are made up of 3-15 or 20 models sepending on Faction, made up of a single Commander model, a number (0-2 usually depending on faction)of Veterans and then the rest Troops.  They have ratings and can have traits to further customise them, different Factions conferring different options for traits alongside some core traits, and also type (Human, Mutant or Synthetic) traits as well.

After this comes gear, covering Weapons, Armor and Equipment.  Everything is bought with 'Supply Points', models, ratings, traits and 'Gear'.  Gear comes in different forms, Common, Scarce or Artifact levels.  you can purchase Common and Scarce items for your Supply Points, but Artifacts need to be found in game.

Dice rolls are all D10s, and every roll is countered by the opponent regardless of what it is for, which is an interesting mechanic.  Activation is by tokens, units might not get an action token in a round.  Players roll off for initiative (or 'Edge') and that player decides who goes first, then the turn is played unit by unit in an IGOUGO format.


I'm hoping to put together a couple of crews, some terrain etc and see how this plays - there are plenty of sci-fi miniatures out there to choose from!

Chain of Command - Kampfgruppe von Luck. Delaying action at the Chateau

The final game if the campaign is, fittingly, on the final map, and pits the remaining soldiers from a company of 21st Panzer Grenadi...