Showing posts with label British. Show all posts

Friday, 11 January 2019

Chain of Command -The Church on the Flank

The lads from 12 Para had put up a good fight and even managed to take the battle to the Germans at one point.

However, the superior firepower and the heavy guns have allowed the Germans into Ranville itself, and Von Luck has sent a platoon of Grenadiers to take and hold the church on the flank. 

The church at Ranville is being held by a platoon of 13 Para, who have used the time bought by 12 Paras valiant defence to reinforce their positions, however a lack of heavy weapons may be the deciding factor in this battle.

However, if you can't hit hard you have to hit smart, and the Lancs of 13 Para will be keen to show themselves every bit as good as the Yorkshire lot of 12 Para - and if they can hold off the Germans here, the bridges will be safe.  All to play for!


The Germans have 13 points of support, possibly 14 if Von Luck smiles on them again.

The Paras will have to be dug in, and hold out against any long range HE such as the Schlepper (7 points) or the Pak 40 auf s307 (5 points).

I was planning to defend behind the church line, using forward Snipers to take out leaders, mortar observers and manned guns on halftracks.  Entrenched LMG teams would hold two corridors on the left and right of the Churchyard, sit back and mop up the Jerries as they advanced.

2 units of 2" smoke mortars would deploy to blind enemy lmgs and attempt to enable the bren sections to split their fire across the enemy LMG teams.  This would also force Jerry to move enemy sections to reduce fire.

The smoke could also be used to to blind the enemy halftracks. The mission requirements for this are to hold at all costs.  It's a free hit for the British, we can lose this entire platoon and fight to the last man.  A draw would be enough as well, so if they can grind this map out we'll win the campaign.


An interesting plan on paper.  However, as you can see from the board above (from the German PoV) Sam had set the table up with the church slap bang in the middle, which would become important as the game started.

(Pictures are from Sam's account of the game, I only took a couple as my phone died :( ) 


We rolled off for FM, Brits on 10 and Germans got 11. We then rolled for Sams free moves, and he hit a 5.  I set up my patrol markers at the front of the church door as per the map, and Sam moved his free patrol moves right up to my markers and locked them all down without me even getting a single move!
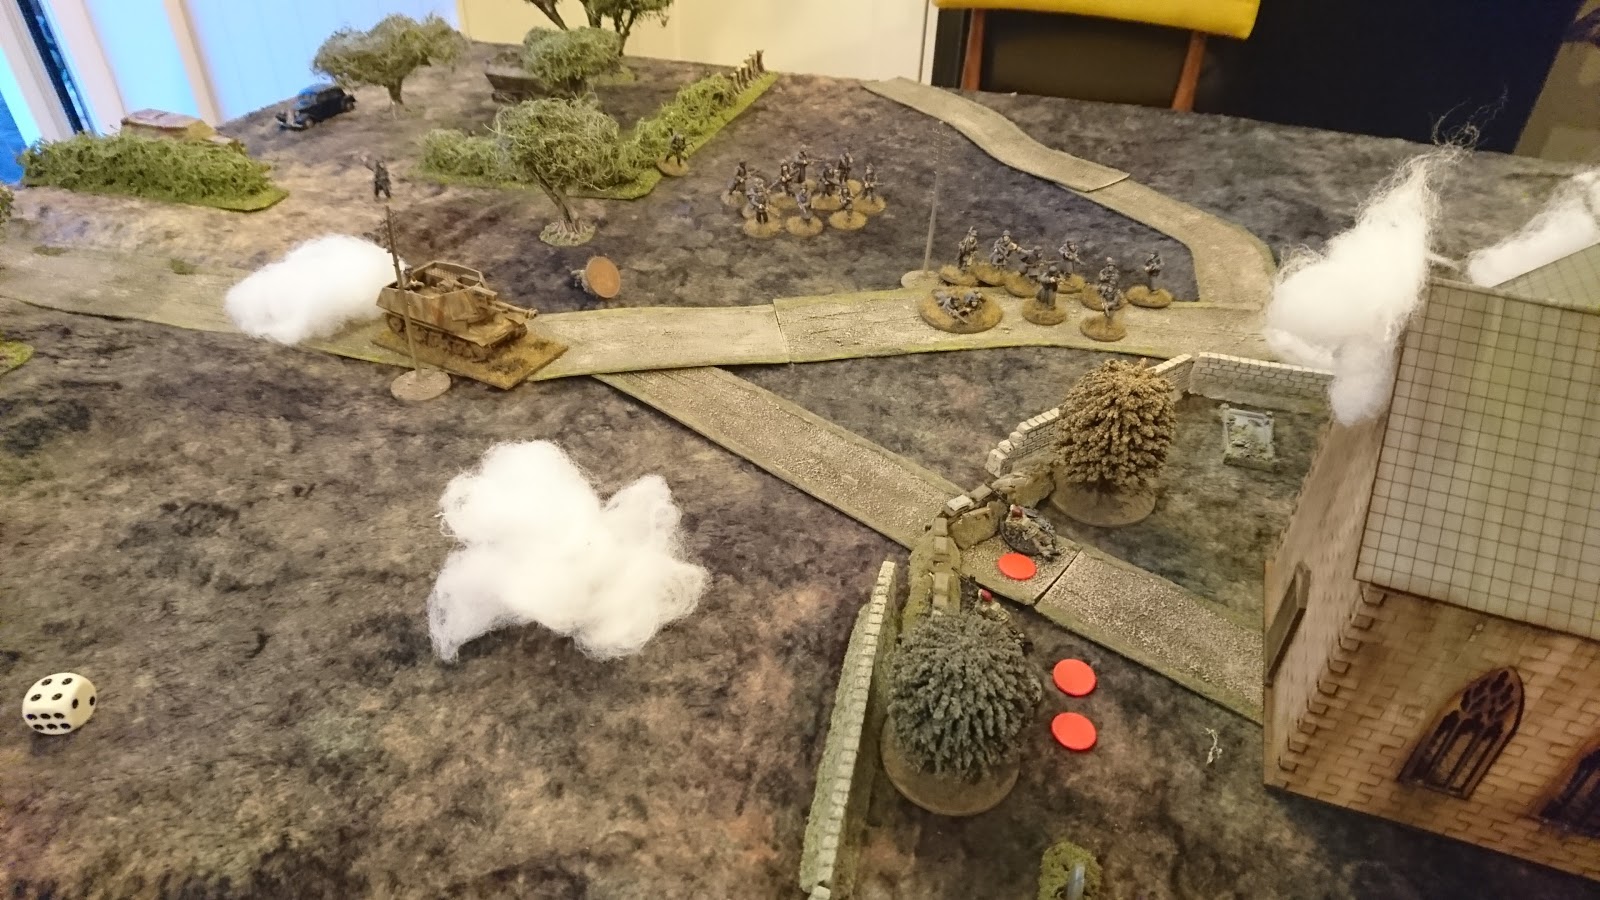

What is left of an entrenched Para section tries to hold off the Germans


This was a problem for me now, as my 'two corridor' defence relied on getting 1 JoP up and two back, but I was now going to be forced into the bottom left corner of the table - not a defence I had planned for. I placed one in the church (as far forward as I could manage) and the other two back on my left flank.

Sam kicked things off by bringing on  a forward observer and calling in a ranging shot (naturalement), a section of Grenadiers, a Senior Leader and the Schlepper.  

The Church was now acting as a giant screen from the Grenadiers as they moved up, and I was going to have to do something to slow these up.  I deployed a sniper in the churchyard and a senior leader behind the church.  The sniper had a pop at the observer, hit but no damage.

I wasn't really expecting the Schlepper (actually being played by a Hotchkiss H-39) and I was going to have to deal with the Grenadiers before they got through the churchyard.  The smoke and PIAT teams who could deal with this beastie would be starting out a long way from the action in the rear JoPs.  My plan was unravelling fast.  The Schlepper surprised everyone by smashing a 105mm round into the church building, causing to it to begin collapsing, and forcing my sniper out into the open.  Obviously the Schlepper crew were 7th Day Adventists!


The church and rear area is stonked by mortars.
2 Grenadier sections now started to advance on the church under the cover of the Schlepper.  Against my original plan, I deployed my entrenched double Bren section in the gateway of the Churchyard and opened fire, kiling a couple of the soldiers and causing some shock.  These guys were in the line of fire of two Grenadier sections and a 105mm HE gun, so they were going to get some pain in return but if they could take out a few of the german MG teams I might have a chance.  A 2" mortar team came in on the left flank, out of sight of the Germans at the moment, and popped smoke in front of the Howizter.  This was going to be my only chance to stop it firing without the PIAT in range.
but they keep coming...

Unfortunately, on the next phase the Schlepper rolled forward through the smoke and pointed its big gun at my guys in the entrenched position.  The Grenadier teams opened up on them as well, killing the Junior Leader and a rifleman.  Having no option now I deployed my second Senior Leader as back up to this section.  My church sniper having redeployed out of the building was out of sight of the FO, so I brought a second sniper in cunningly concealed in the road and he took a shot at the German FO as well, missing.

The sniper also took a shot at the gunner on the Schlepper, and we rolled to see if it was the JL hit (which it was!)  He was injured and lost a CI, so the Schlepper could either drive or shoot but not both - which it couldn't do anyway!

The german observer brought down the mortar barrage on the church, pinning my sniper team and senior leaders.  The church was in danger of collapse, but the remaining PanzerGrenadiers began to move forward, finishing off my lads in the front of the churchyard.
The Church collapses, rendering my forward Jump Off Point unusable

The unpinned soldiers pulled back to the rear of the churchyard, and the Schlepper moved up.  At this point I managed to deploy my PIAT team, who took a long range shot at the big gun but missed.  They took the full force of the Germans closing in and were removed from the table.  Another Light mortar team popped up and tried to block LoS to the Schlepper, but the shots went wide.  


Mortar smoke falling way out of where I wanted it to

The remaining para sections tried to flank the church to the right and get to the German positions, but this opened up my left flank and the germans advanced and captured my JoP, ending the turn and finishing the game.


Paras try and flank the Germans


Thoughts.  

This Platoon were a throwaway so I knew I could be a bit less cautious, but my plan to hold a deep line and force the Germans to attack down two sides was disabled by the patrol phase being so short.  This wasn't intentional on Sams part, you only need 3 free moves to get a patrol marker 24" up the table, but as the Brits started off in the middle of the table we were always going to struggle to move very far.

Digging in is good for veterans, but they are always going to be targets for barrages and HE.  It might take a few phases to whittle them down, but you need to use that time to bring supporting forces up.  I struggled to deploy my 2" mortar and PIAT teams, and when they did come on they failed to shut down the Schlepper.

It's down to the final map and the final game.  see what happened here


Monday, 5 March 2018

Snow Days and Paras


So, a rare Snow day and an opportunity to work from home catch up on some figures, but as my youngest son who was off school as well and looking for something to do after rolling around in the snow, I suggested a game of Bolt Action and set it up while he warmed up.


After the last Chain of command game pitting Paras against Panzer Grenadiers, I'd painted up about 500 points of late war germans and nicked an MMG from the Afrika Corps chaps to make up a 550 point list.  I thought we'd have a defensive game, the germans holed up in a farm house protecting a fuel supply.  Some British Paras have arrived nearby and are looking to claim it for their own!

the lists were - Ze Germans...

a Vet 2nd Lt and 1 man with SMGs
2 squads of 10 men, an NCO with an SMG and 2 LMGs
1 Sniper (unfortunately the second model has an STG44 for some reason, which had quite an effect later on)
1 MMG tripod MG42 with three crew

set up to take these germans on was a platoon of British Paras

1 Vet 2nd Lt and one man with SMG's
3 squads of 8 men, 1 NCO with SMG, 2 SMG's a Bren gun and the rest rifles.
1 light mortar team.

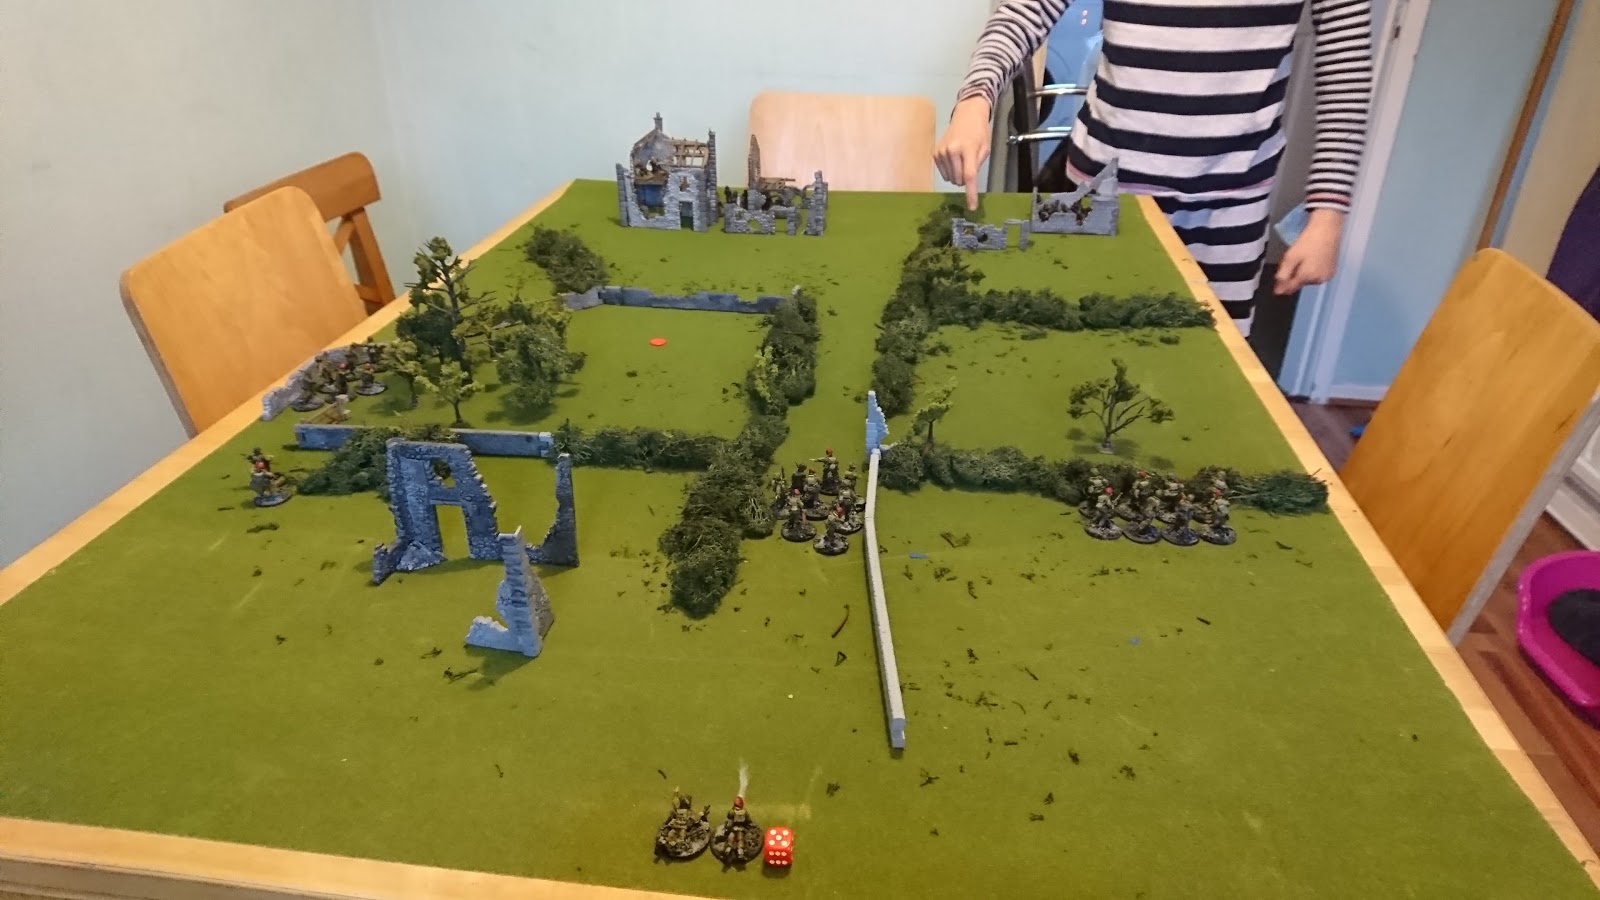
I set up the Germans in pre planned positions and offered my son the choice of playing the Germans or the Brits, and he chose the Germans, defending the farm at the top left of the picture.


The British arrived at the opposite narrow edge, the light mortar covering the road, two sections on the left and one on the right flank.  I wanted to use teh smoke to blind the german firepower and then move up and strike close up.


The first thing Oberleutnant Freidrich did was move his MMG team from the position covering the road to the farm buildings on his left flank.  The plucky brits moved into the road and up to the hedges.  A german sniper had taken up residence in the  upper floors of the farm house, and took a pot shot at the British Lt, but fortunately missed.


The german MMG took up position in the corner of a hedgerow, and openend fire on the approaching para section, who were hunkering down hiding from the sniper in the farm house. The para section lose two rifles, and starting with smaller 8 man sections, this will prove to be costly.

The paras tried to drop smoke to cover their approach.


But it misses, covering the approach of the other section.  The section on the left flank move up and start firing on the sniper in the building, pinning him, but he fires back - although he's too close for the Sniper, so uses his rifle and his assistants STG44!!  The extra dice for the Assault Rifle do well, killing the Section leader. The Platoon CO and Sgt move up with them, clearing their pins (from the german MMG) and also opening fire on the snipers, killing them and clearing the way for a charge into the building.  My other sections are holding up the ground on the right, hoping to draw away one of the Grenadier Sections.

Unfortunately for Paras, covering the sniper nest was the German CO who pops out from behind the farmhouse and sprays the lead section with SMG fire, casuing another two casualties and some more pins. The section is now down to three men.

On the right, I'm trying to get my Paras to move up and over the hedges without getting withered by LMG fire from a section of grenadiers who have taken up position in the building.

Using the hedge as cover, the Paras wait for smoke to cover their approach and it does!  To counter this, the Germans rush out of the building but can't draw line of sight to the Paras, who charge over the hedge - but, just too far to initiate combat they open fire with their Bren and sten guns!  Masses of lead pour towards the germans in the open, but the Germans manage to avoid taking any casualties, and the first dice of the next round will decide who initiaties combat.

Its British who have the initiative, and the Paras, surprised at the lack of german casualties from their fire, pile in.  I'm going to get first attack, but these Grenadiers are Veterans of the Eastern Front, and they only take two casualties from my attack.  They reply with a devastating 4 kills, and my section are removed from the battle.  The Grenadiers consilidate into the hedgerow and start looking for other targets.  My second section are still covered by the smoke from the mortar, and they bravely charge towards the farm hoping to reach cover.

The grenadiers open fire, but fortunately the Paras only take a pin and the MMG packs up and moves around to get a better position for the next turn.

Over on the Paras left flank, the CO charges forward to engage the enemy commander, and orders his now two man section to 'Snap to Action!' and open fire on the enemy officers.


Unfortunately, the section respond with a raspberry and two fingers and run back towards their own lines!  The CO is lucky my Fubar roll didn't involve them unleashing the fire back at them!  The German CO and his trusty sidekick engage the British Lt in hand to hand to hand fighting, and brush them aside without further ado.


The Second section move towards the Farmhouse under the Grenadiers fire.  THe mortar takes a pot shot with HE at the MMG team who have moved out of  cover, and hit it directly first time, destroying the unit.


AShamed of their lack of spirit, the beleagured bren gunner turns round and finishes off the enemy commander, and move up towards the farm.  The Grenadiers jump over the hedge and assault the paras, and after two brutal rounds of combat the Germans lose, and the british are down to two men.  The Mortar team are the only useful unpinned unit left, and they sprint towards the farm as well.

The two battered Para sections manage to hold off the few remaining Germans, and the mortar team move into the farm and take the objective, but with such a high price paid we decide to call it a draw.


Sunday, 4 February 2018

Chain of Command - Para Support!

Continuing the theme of the Para list from Chain of Commands 'Pint Sized Campaign' Kampfgruppe Von Luck, the support options for the British Paras defending the town are quite limited, but I can cover them with most of the figures from my BA British Para list.

In the campaign, the Brits are very short of numbers and support and subsequently would probably struggle to play a battle with many of these options present at the same time, so there may be a crossover of figures within the support lists.

Medic.  Medics work quite differently in CoC, and are only there to protect your Senior Leaders from getting wounds and/or dying.  There is also the option to have another PIAT team if required or a 2" mortar team.


You can also select an extra section as two seperate teams, a Bren team and a rifle team.  If you select both teams, they come as a full section with a Junior Leader with a Sten gun.  This section is not part of your platoon, and are considered to have been picked up.  I like to think of these chaps as having battled through the enemy positions after a bad drop, and picking up a few injuries and souvenirs along the way.


 More expensive support options are available, in the form of a 3 man Flamethrower team.  


 a Forward observer for a 3" Mortar Battery - (the wounded para is there to represent the Senior Leader if he is wounded in a game, he carries the wound for the entire campaign)


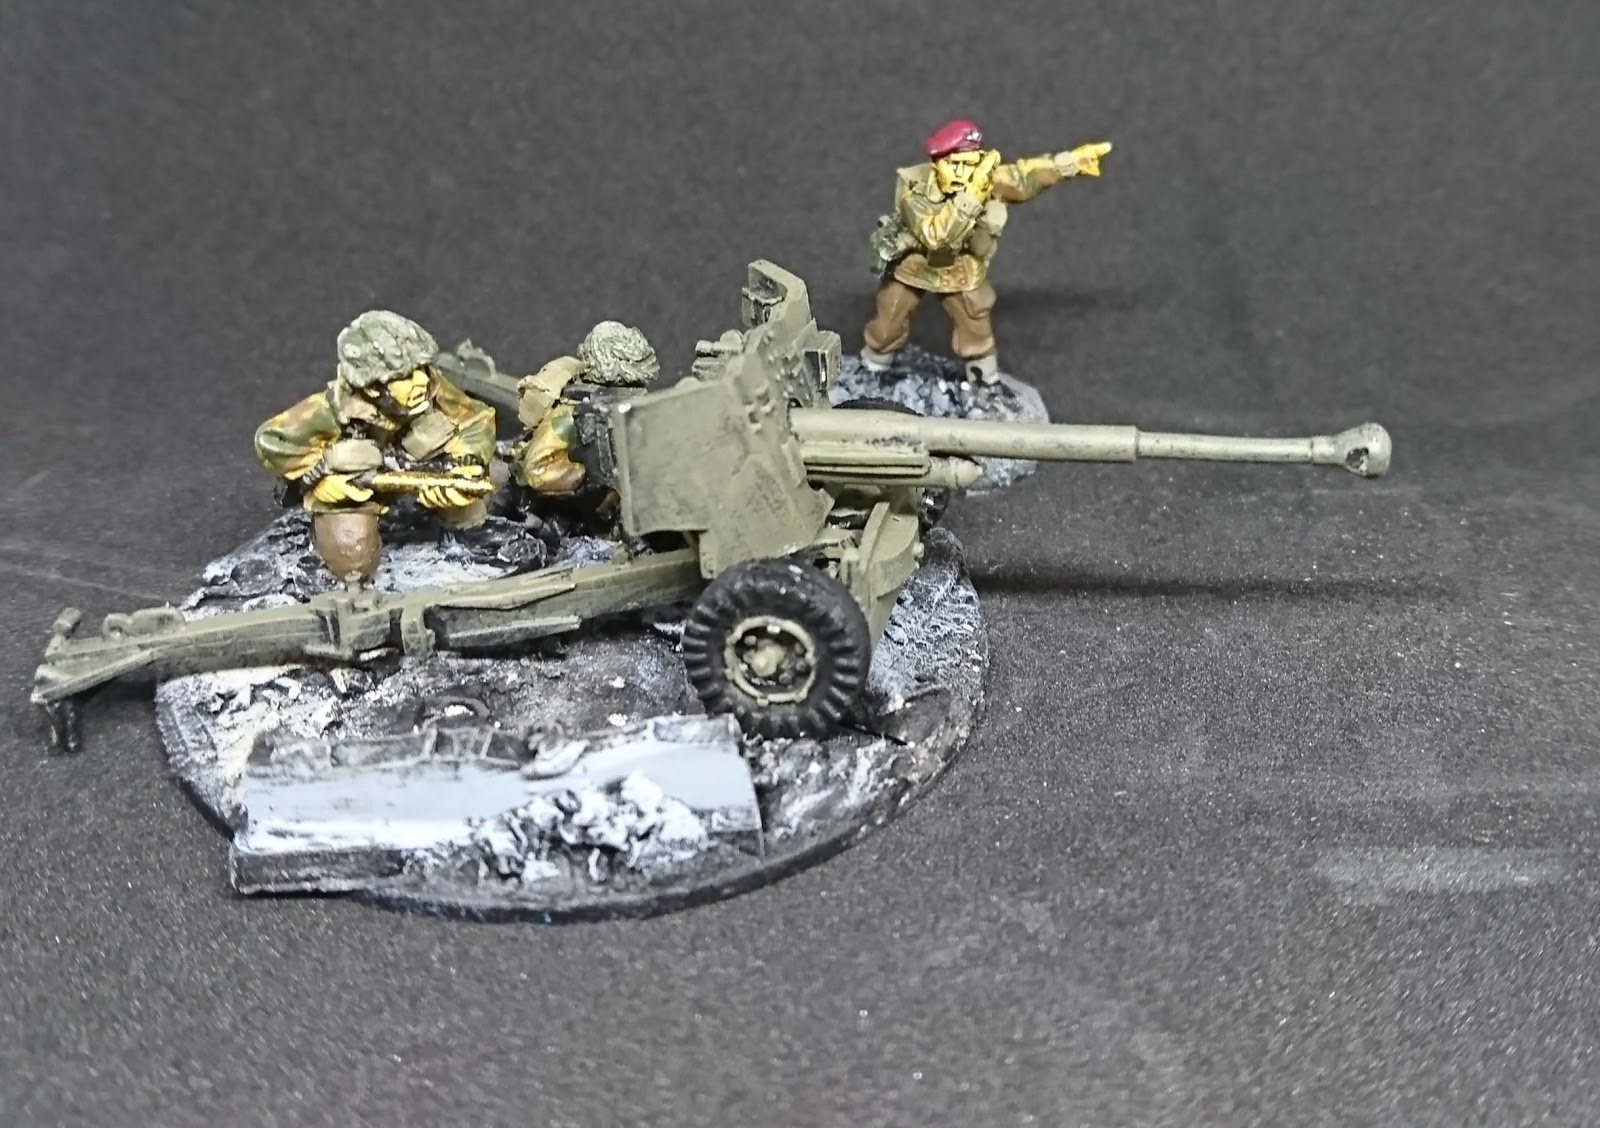
and finally the 6 pounder ATG.  The Germans in this campaign have access to a 15cm Self Propelled Howitzer, the Lorraine Schlepper.  This Airborne 6 pounder only comes with 3 crew, so I've borrowed some others from the 75mm Pack Howitzer teams I use for Bolt Action.


Monday, 13 November 2017

20mm (1/72) ish British Battle of Arras!

A few months back, my youngest son was learning about the early parts of World War Two at school.  They glossed over a lot of cool stuff in my opinion relating to the Battle of France, so I wanted to explain a little bit about what happened during the early part of the war, concentrating on the Battle of Arras where British tank regiments burst through the German lines.

My son had got some of those Valiant 20mm miniatures, (although they come in at more like old school 25mm), so I suggested that we could paint some of them up and have a little battle.  It was also an excuse for me to get hold of one of my favourite tanks of WWII, the Matilda Mk II.


3 x Matilda I tanks (metal, from Early War Miniatures), 3 X Matilda II tanks (Resin, from Millicast), a 2lb ATG (Zvezda), a platoon of rifles made up of two 10 man squads with a bren gun, a Vickers MMG, a medium mortar, an artillery spotter and a Bren carrier (PSC).  There is also a 25 pounder airfix model with Quad Tractor rocking about somewhere that I should paint up as well.

Next up is the Germans, (pics to follow), again using Valiant miniatures.  Their list looked a little like 3 x Pz IIcs, 3 x Pz 38s, 2 squads of rifles with SMG and LMG, 2 x 251 Half Tracks, an 88mm ATG with Prime Mover, and two MMGs.  I'm not sure how balanced this is, the Pz 38s only have a light ATG and the Matilda IIs are Heavy tanks.  Of course, that was a realistic outcome of the battle of Arras, where they ended up using their 88mm guns to halt the advance of the Matilda I and II tanks as they were the only weapon that seemed to have an effect.

We played a little meeting engagement to get my lad used to the rules, a HQ, a couple of squads, I had an MMG and he took a Medium Mortar  (I was the Germans) I got the 88mm and he chose the Matilda I.


 An out of focus 88mm targets the Matilda I hiding in the ruins of the old farmhouse.  In the distance the 3" mortar team try and work out if they can see the 88...

Although I tried in vain to smash the Matilda with the 88, the worst I could do was give it a turret jam.  It cleared out my MMG team and held it's ground, pinning one of my squads.  The mortar rained down on the 88 but even getting a direct hit at one point, with 8 crew serving it, it kept firing throughout the battle, even turning the tables on the 88 and taking it out with a single shot.

The british squads used the ruins and cover to move up, and eventually casualties told on the German side.  One german squad rallied and attempted to confort the british in a hand to hand attack but were repulsed.  Only the Lt and the 88 survived the battle, the british sweeping the table with the damaged Matilda and most of their infantry intact.


 The victorious general salutes the final remnants of the battlefield...


Added some decals to the Matildas, courtesy of Dan Taylor Modelworks.  This is 'Gretna', a 7RTR Matilda II from the battle.


And this one is Galahad.


Chain of Command - Kampfgruppe von Luck. Delaying action at the Chateau

The final game if the campaign is, fittingly, on the final map, and pits the remaining soldiers from a company of 21st Panzer Grenadi...